
In this article series, we will build a simple Node.js app that hosted on AWS EC2 instance. Furthermore, we are going to configure automation server and host Jenkins on a separate AWS EC2 instance. Jenkins will help us to automate the CI/CD process. For every code change from our Node.js app repository, Jenkins will get notified and it will pull the changes into our Jenkins server, install dependencies and run the integration test. If all tests pass, Jenkins is going to deploy the app to the node server. If it fails, developer will be notified.
In this article?
- Install NodeJS Plugin on Jenkins
- Create and configure a New Jenkins Job
- Add Git Webhook
- EC2 SSH Authentication
- Automatic Deployment Setup
- Commit and Push Test
Prerequisites:
Before we start there are some assumed preconditioned technological setups:
- You have read Part 1
- You have read Part 2
Install NodeJS Plugin on Jenkins
- Login to your Jenkins IP Address
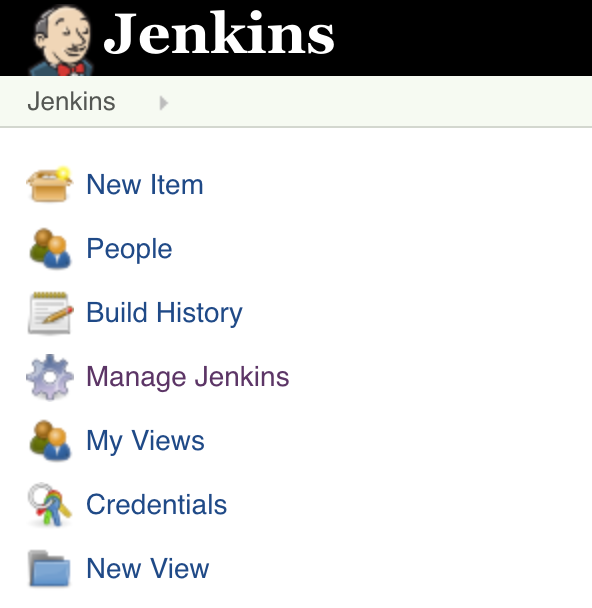
- Go to sidebar menu and select Manage Jenkins
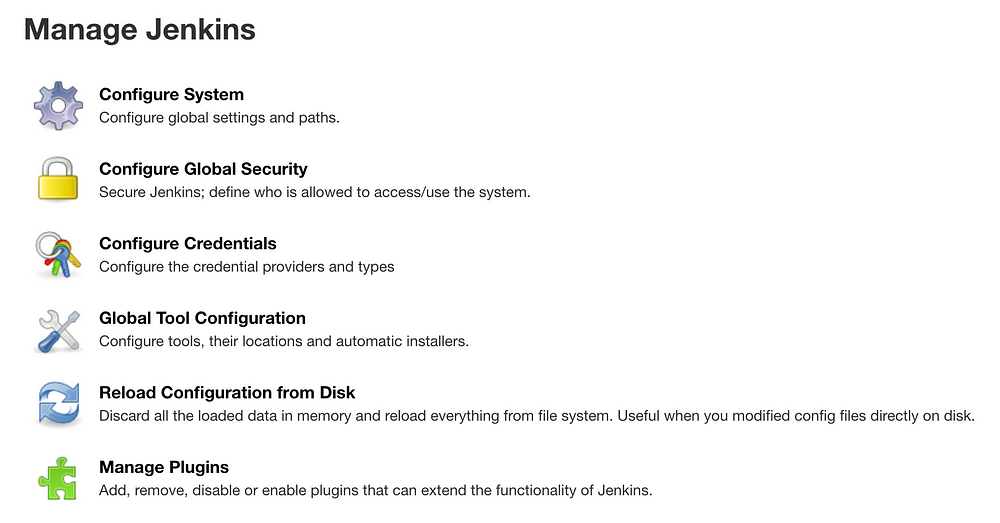
- Go to Manage Plugins
- Select Available tab
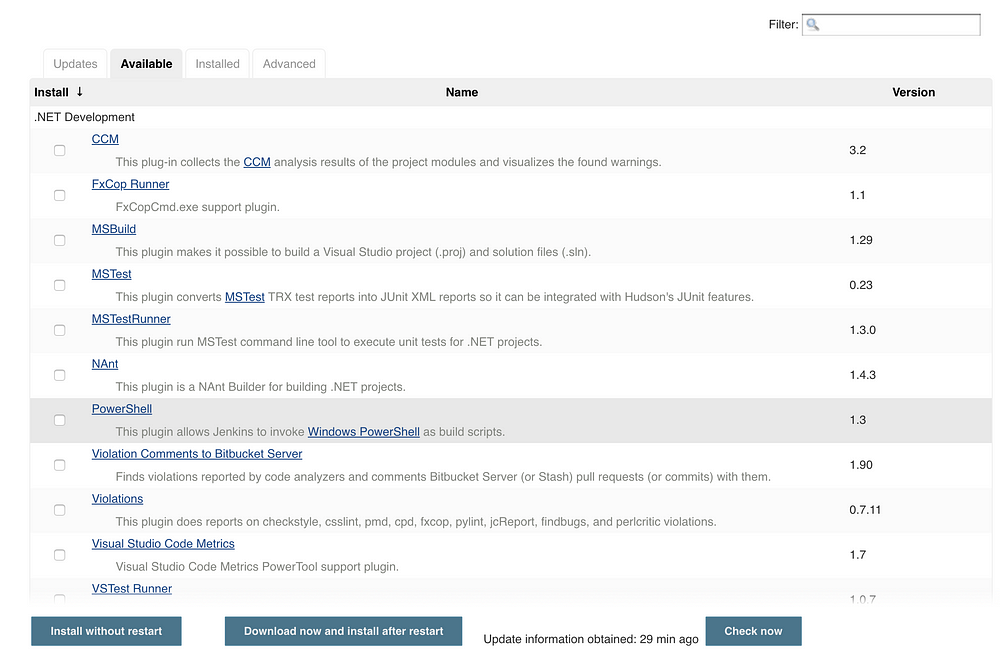
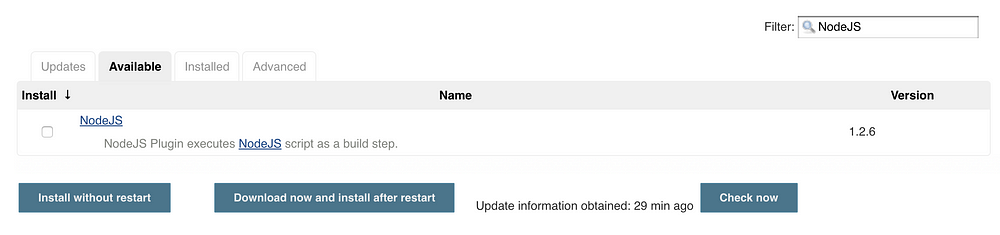
- Type NodeJS on searchbox
- Check the checkbox of NodeJS plugin and click Download now and install after restart
- When the plugin is downloaded successfully, check Restart Jenkins when installation is complete and no jobs are running

- Just wait until Jenkins finish restarting
- Usually after restarting, Jenkins will ask you to login again
- After login, go to Manage Jenkins
- Now, choose Global Tool Configuration
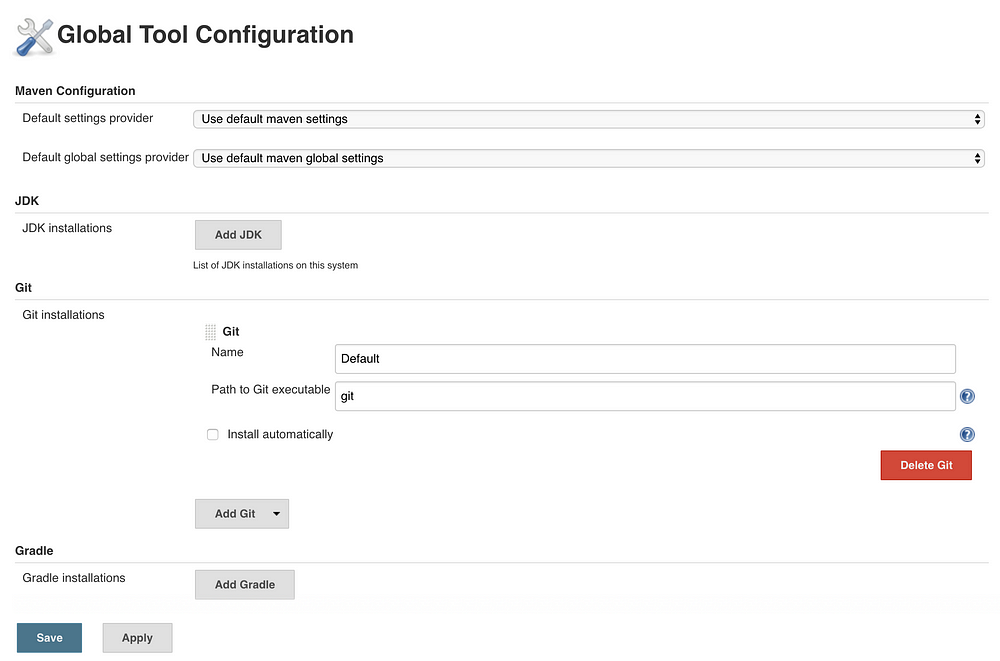
- Go to NodeJS section
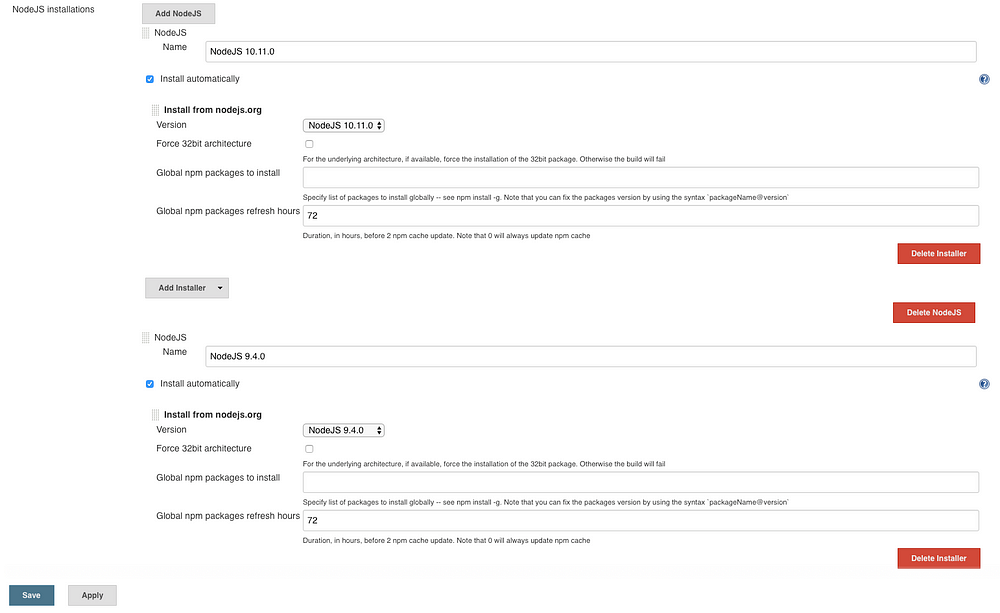
- Click Add NodeJS to add NodeJS installation options that we want to provide to project which will use it. For now, we will add the latest version of NodeJS provided by Jenkins and another version
- Click Save
Create a new Jenkins Job
- Select New Item sidebar menu on Jenkins
- Type “node-app” for the Jenkins Job’s name
- Select Freestyle project
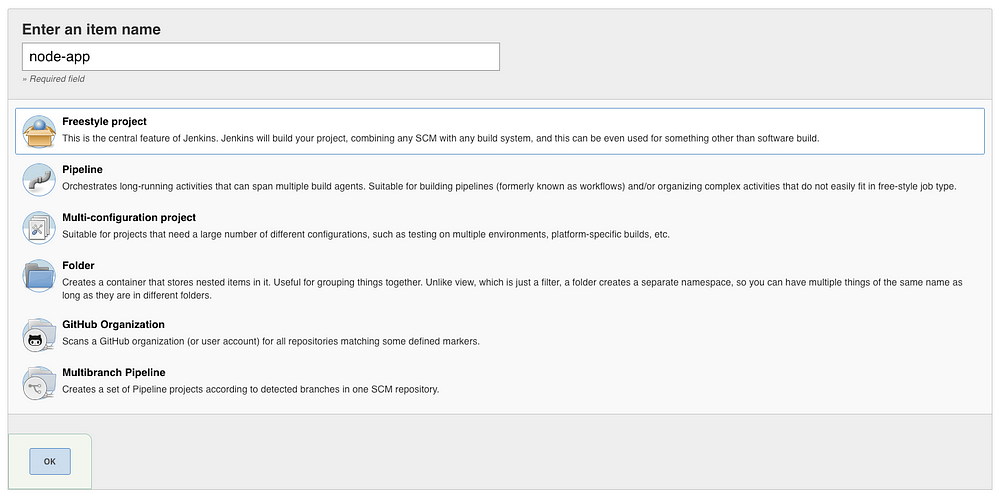
- Click OK
- On Source Code Management section, paste “node-app” GitHub repository url to Repository URL field. You could specify which branch of the repository you want to use to build your project. Now, we will select master branch
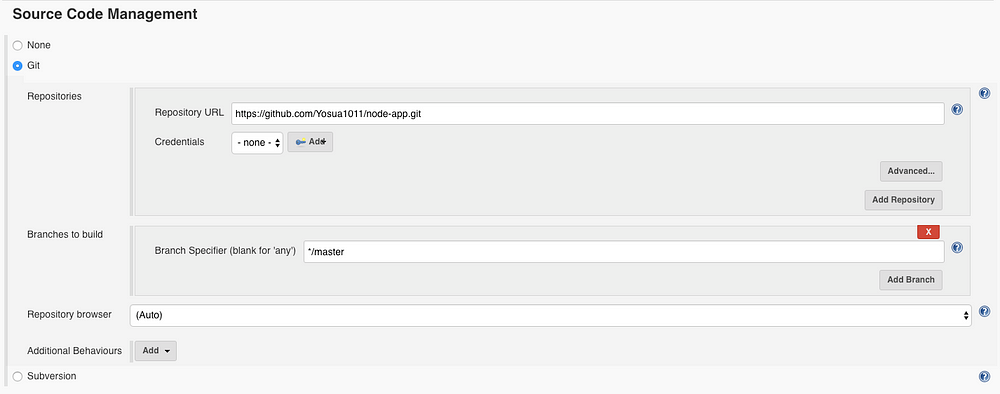
- On Build Triggers, check GitHub hook trigger for GITScm polling. So, for every git push on the master branch, it will trigger Jenkins job to start

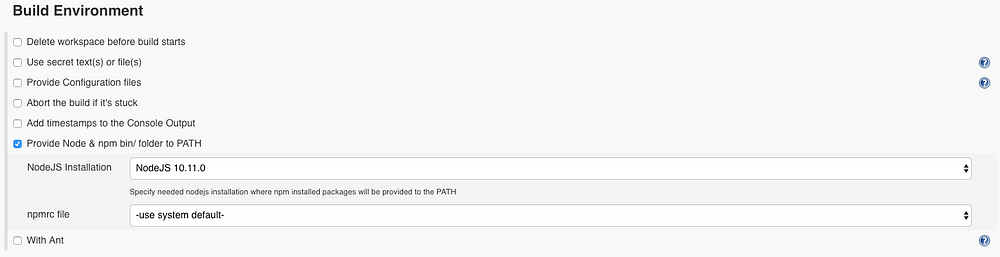
- On Build Environment section, check Provide Node & npm bin/ folder to PATH. From that, you could choose which NodeJS Installation that you want to use
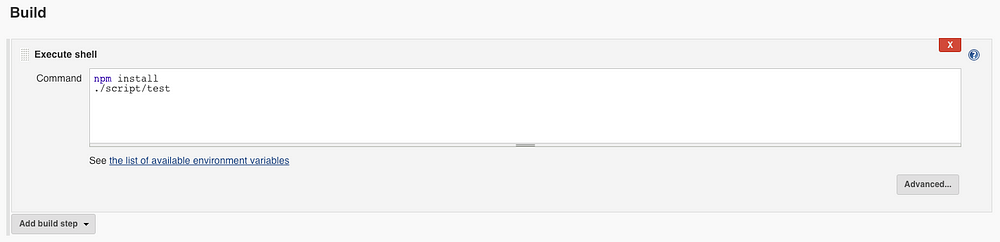
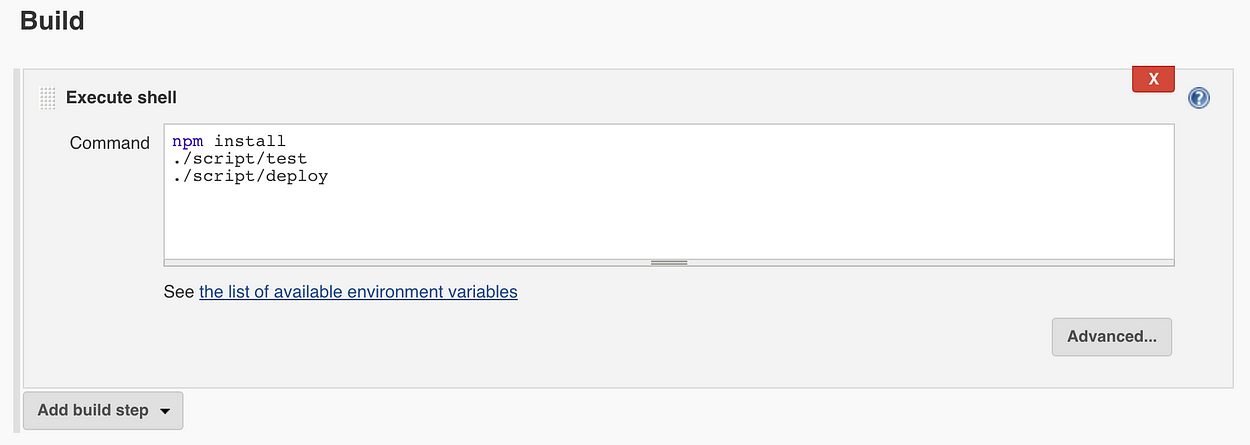
- On Build section, click Add build step and select Execute shell

- Copy paste this into Command field
npm install
./script/test
- Click Save to save your Jenkins job configuration
Add Git Webhook
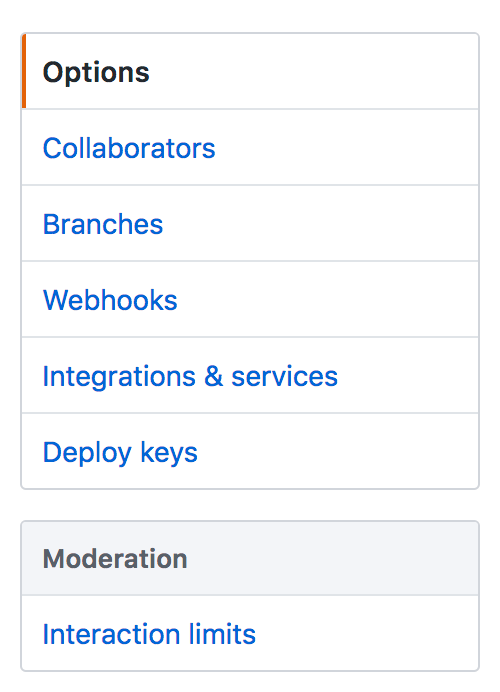
- Go to your “node-app” on your GitHub
- Click on the Settings tab
- Select Webhooks from the left menu
- Click on the Add Webhooks button
- If you are prompted, type your GitHub account password
- Enter your Jenkins webhook URL into Payload URL field
http://JENKINS.SERVER.IP:8080/github-webhook/
- Select Just the Push Event option

- Click Add webhook button
EC2 SSH Authentication
To take care the authentication process, Jenkins server will need to ssh into the node-app server, clone the repo, install dependencies and restart the server.
1. Ubuntu Linux에 설치한 Jenkins 서버에서 node 인스턴스에
접속하는 SSH 설정
(Amazon Linux는 아래 2. 을 참고)
- SSH into Jenkins server
- Switch to Jenkins user
sudo su - jenkins
- Generate SSH key
ssh-keygen -t rsa
- Save the generated key in /var/lib/jenkins/.ssh/id_rsa
- Leave the passphrase empty
- Print the SSH key you just created
cat ~/.ssh/id_rsa.pub
- Copy the output to your clipboard so you could put the public key on the node-app server to complete the authentication between Jenkins server and node-app server
(클립보드에 복사) - SSH로 node-app 서버에 접속
- SSH into node-app server
- Open the file where authorized keys are stored
vim ~/.ssh/authorized_keys
- Press i key on your keyboard to enter INSERT mode
- Go to the end of the existing key and press enter key to enter new line
- Copy paste the Jenkins public key we just created into that file
- Save by pressing the esc button and type :x and press enter
- Set the correct permission on the .ssh folder
chmod 700 ~/.ssh
chmod 600 ~/.ssh/*
- To check whether your Jenkins server already has SSH access to node-app server without entering a password. Run these command:
ssh ubuntu@JENKINS.SERVER.IP
sudo su - jenkins
ssh ubuntu@NODE.APP.SERVER.IP
If you could access node-app server from Jenkins server through SSH then your SSH set up is done.
2. Amazon Linux에 설치한 Jenkins 서버에서 node 인스턴스에
접속하는 SSH 설
- SSH into Jenkins server
- Switch to Jenkins user
sudo su -s /bin/bash jenkins
- Generate SSH key
ssh-keygen -t rsa
- Save the generated key in /var/lib/jenkins/.ssh/id_rsa
- Leave the passphrase empty
- Print the SSH key you just created
cat /var/lib/jenkins/.ssh/id_rsa.pub
- Copy the output to your clipboard so you could put the public key on the node-app server to complete the authentication between Jenkins server and node-app server
(클립보드에 복사) - SSH로 node-app 서버에 접속
- SSH into node-app server
- Open the file where authorized keys are stored
vim ~/.ssh/authorized_keys
- Press i key on your keyboard to enter INSERT mode
- Go to the end of the existing key and press enter key to enter new line
- Copy paste the Jenkins public key we just created into that file
- Save by pressing the esc button and type :x and press enter
- Set the correct permission on the .ssh folder
chmod 700 ~/.ssh
chmod 600 ~/.ssh/*
- To check whether your Jenkins server already has SSH access to node-app server without entering a password. Run these command:
Jenkins 서버에 ssh 로 다시 접속
ssh ec2-user@JENKINS.SERVER.IP
#jenkins로 계정 변경 sudo su -s /bin/bash jenkins
#jenkins 계정 상태에서 node 서버로 ssh 접속 시도
ssh ec2-user@NODE.APP.SERVER.IP # 서버를 인증하겠냐는 질문에 yes 로 답변[주의]ssh 인증서를 node 서버에 설치 후 위의 메뉴얼 접속 과정을 거치지 않으면 jenkins 배포 과정에서 node 서버의 쉘을 실행할 때 권한 오류가 발생함
만약 접속 자체가 되지 않으면 보안 그룹 확인
node 서버의 보안그룹 > 인바운드에
Jenkins 서버의 private IP, subnet CIDR, Public IP 중 하나의
22번 포트(SSH)를 등록해야 함
Automatic Deployment Setup
We need to create another shell script that responsible for the deployment.
- Create a file under script called deploy and add the following script
#!/bin/sh
ssh cc2-user@NODE.APP.SERVER.IP <<EOF
cd ~/node-app
git pull origin master
curl -o- https://raw.githubusercontent.com/creationix/nvm/v0.33.8/install.sh | bash
. ~/.nvm/nvm.sh
nvm install v10.11.0
npm install
npm install -g nodemon pm2
pm2 restart ecosystem.config.js
exit
EOF
This script will SSH to node-app server, go to node-app directory, pull changes from GitHub, install dependencies and restart server.
- Make our new script file executeable
chmod +x script/deploy
- Now, we need to add ecosystem.config.js on node-app root directory with this content
module.exports = {
  apps: [{
    name    : "node-app",
    script  : "npm",
    args    : "start"
  }]
}
Here is the final folder structure:

- Before we commit our changes lets add the deployment step to our Jenkins job. Go to Jenkins and go to node-app project

- Go to Configure on the sidebar menu on node-app project

- Add this line to Build section, Execute Shell Command field
./script/deploy
- Click Save
Commit and Push Test
Now, we will test everything we built.
- Commit and Push
git add .
git commit -m 'add deployment script'
git push origin master
- After you push, you could see Jenkins job starts in Jenkins dashboard
- If your build is success now you could visit your node-app ip with port 3000 to check the respond
http://NODE.APP.SERVER.IP:3000
- Now to check the CI/CD. Go to node-app project and edit index.js file to respond with “hello awesome”.
- Don’t forget to change your test/test.js to test for that string as well
- Commit and Push
git add .
git commit -m 'change the respond'
git push origin master
- After you push you should see Jenkins job starts and when it is complete, you should see your changes
- If you want to do the Build manually you could click on Build Now which is on the sidebar menu of your node-app project
AND WE ARE DONE! CONGRATULATIONS!
[Trouble shooting]
Jenkins에서 아래 오류 발생 시 조치 방법
sudo: no tty present and no askpass program specified
Build step 'Execute shell' marked build as failure
Jenkins 서버에 접속
$ sudo visudo
Once vi editor opens make the following changes:
Comment out
Defaults requiretty# Defaults requirettyGo to the end of the file and add
jenkins ALL=(ALL) NOPASSWD: ALL
'AWS_NCP > AWS DevOps 구축' 카테고리의 다른 글
| 도메인 구매 및 Route55 연결 (0) | 2019.06.18 |
|---|---|
| 11. 스프링부트로 웹 서비스 출시하기 - AWS Linux 재기동 후 쉘 실행 (0) | 2019.03.14 |
| AWS에서 Jenkins와 Node.js를 이용한 서비스 구성 Part2: Node.js App과 EC2 application server (0) | 2019.03.02 |
| AWS에서 Jenkins와 Node.js를 이용한 서비스 구성 Part1: Jenkins 구성 (0) | 2019.03.02 |
| 10. 스프링부트로 웹 서비스 출시하기 - 10. 1인 개발 시작시 알았으면 좋았을 것들 (0) | 2019.02.27 |
